During this blog write-up, I am assuming that you have a basic knowledge of Docker and you know your way around Unraid and can access the volume / folder where your container's persistent data is stored
This is the base install to my "Blog Site" currently running on GRAV CMS as its base and using the default "Quark" Theme, just modified slightly to have Dark Mode / Light Mode capabilities.
Also, this modification could not be possible without the work done by Louis Charette I simply took what he did and extracted the parts I needed. He gets all the credit.
I believe there is a theme called Typhoon that has this feature (and a lot more!) but it is not available without a fee ($50), since all I needed was just the "Dark Mode", I have implemented the solution from "Louis Charette" which is what is on this repository.
I tried to follow Louis steps from his blog, but I failed to implement his approach (I have zero knowledge of how Grav works and this made it difficult to understand his steps) and had to resort to trial and error until I got my results which I bring to you on this blog post, you are welcome to head over his blog and follow his steps.
I run this blog on a docker container hosted on Unraid OS and use the GRAV CMS image managed by Linuxserver.io those guys keep the images always up to date.
Installation from Scratch (On Unraid OS - Modify as needed for your environment)
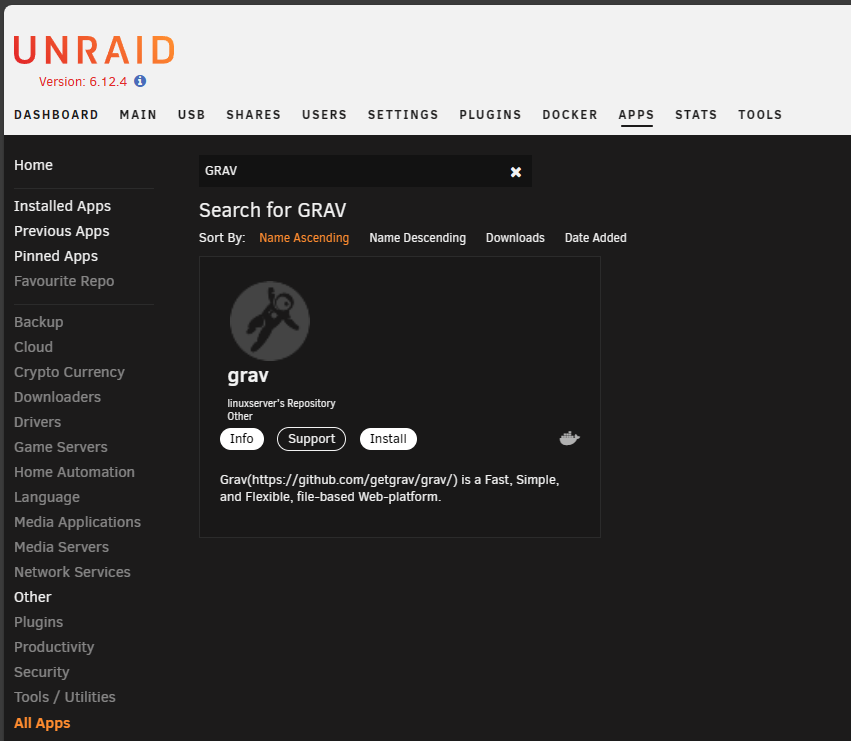
- Visit the App Section on Unraid and search for "Grav"
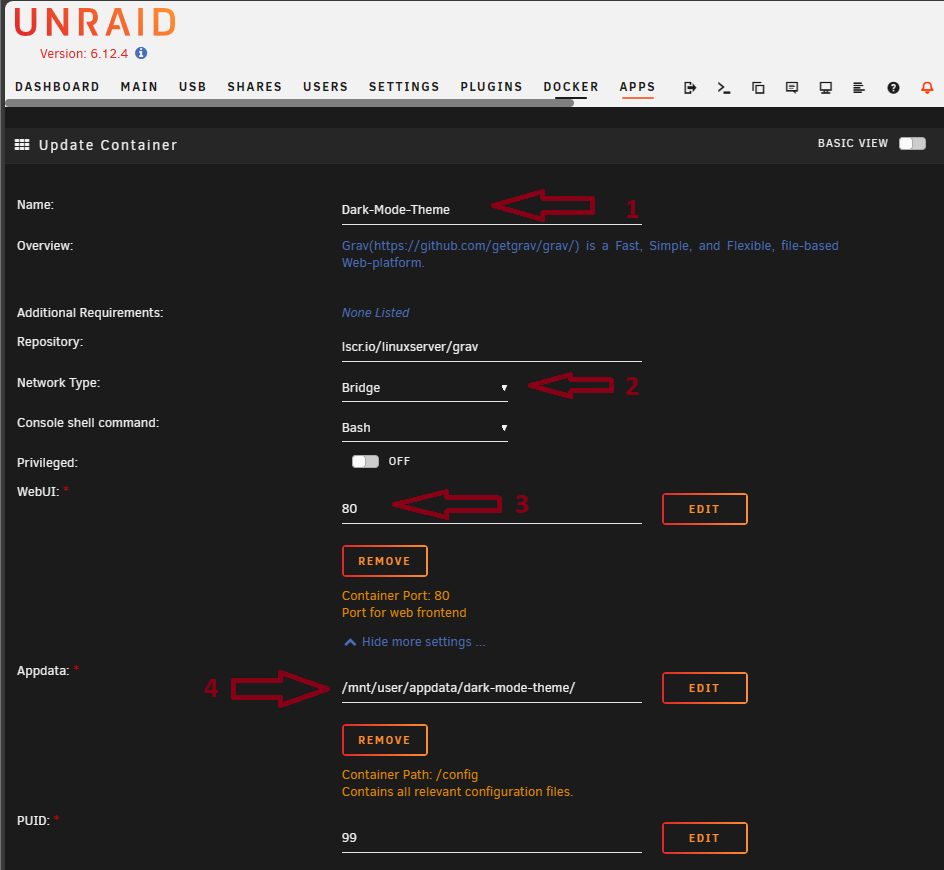
Make sure you give your template:
- Name (This will be your container name).
- Assign it to your network of choice.
- Give it a port number that is free.
- Give it a local storage this way your changes will remain if you need to restart/rebuild the container
First Run of New Container.
you will find your website under http://localhost:port
- localhost: Can also be the IP address where your docker server is running in my case is my Unraid server. [http://10.147.250.105]
- port: This was the free port you chose during container setup. In my case I picked "83" because "80" was taken, so my URL to access my blog "Locally" is [http://10.147.250.105:83]
On your first run you will be presented with the Admin Panel registration form you must fill this out before you can continue
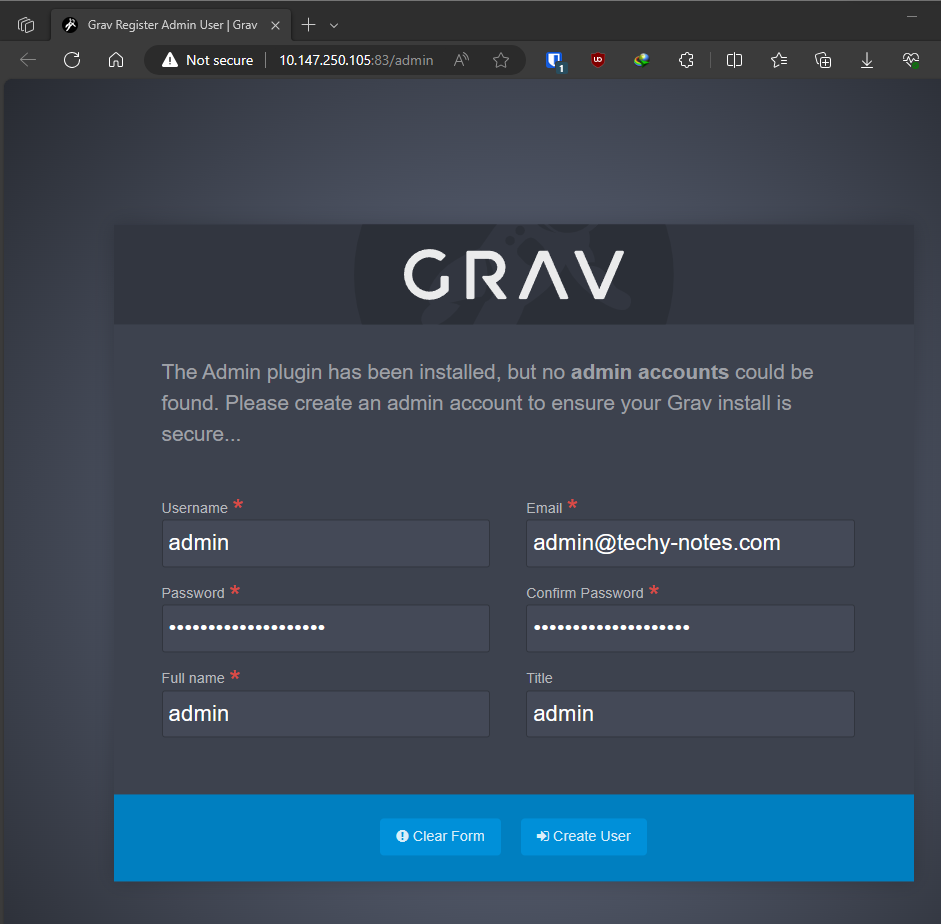
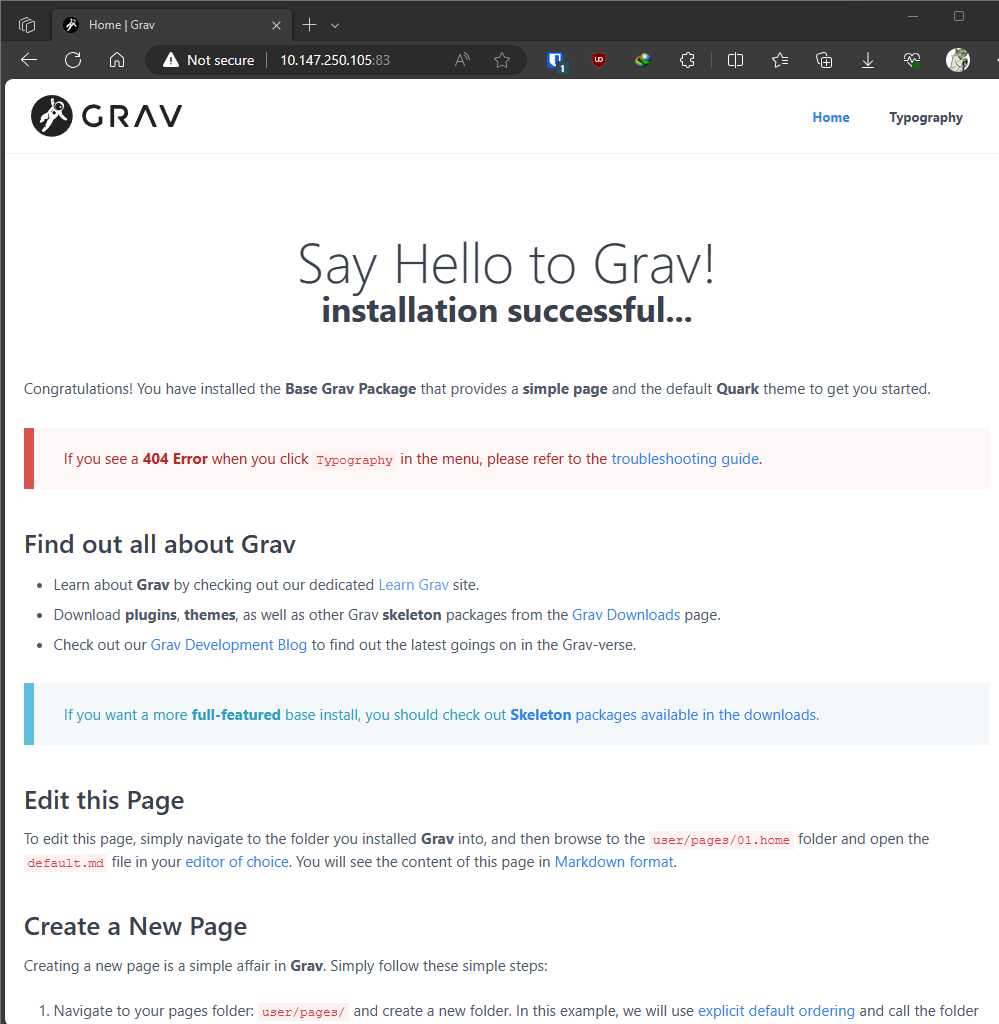
After you enter your details, you need to re-enter the URL again but his time you will see the demo site.
- To access the "Admin" section from now on you will need to add the "/admin" to your URL [http://10.147.250.105:83/admin] (Edit to fit your URL)
Extending the Quark Theme
We need to interact with the container to "Extend the Quark theme a.k.a Make a clone" so we can make our changes and still be able to update Grav and its default "Quark Theme" without breaking our changes.
To do this we will use "inheritance", this is part of the "DevTools" plugin, so we need to install this plugin first, an easy way to do this is to use the admin section.
Open Admin section, click on plugins, then on upper right side click on "Add" and search for "DevTools" and install it.
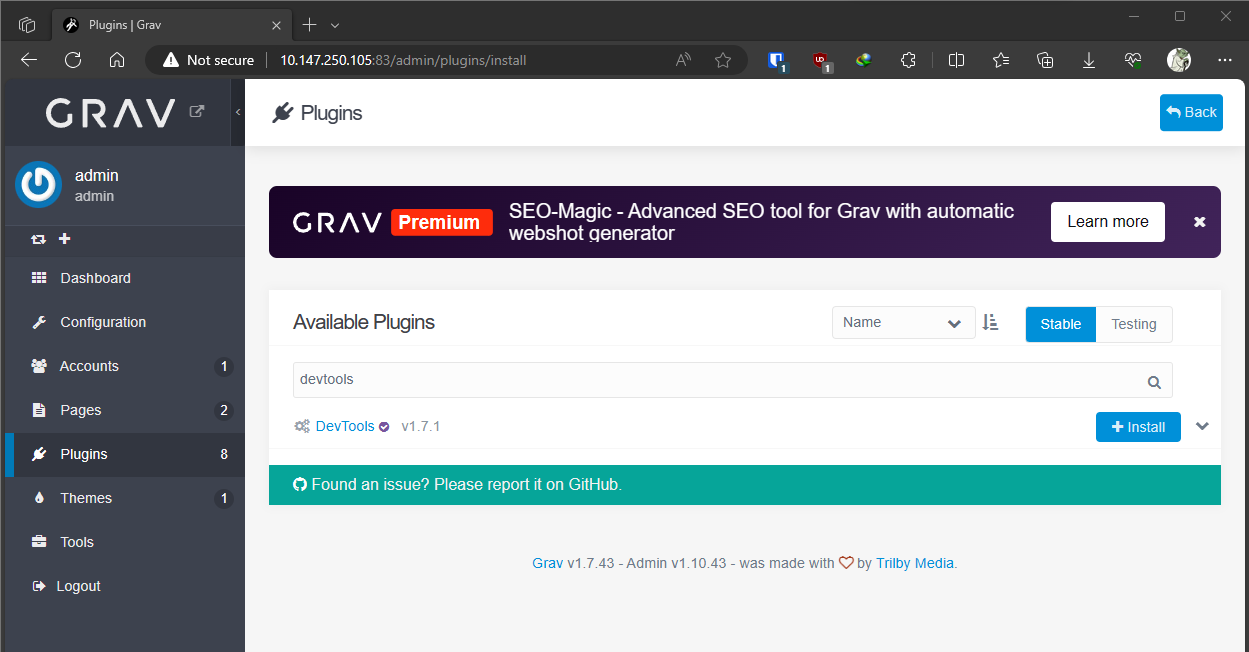
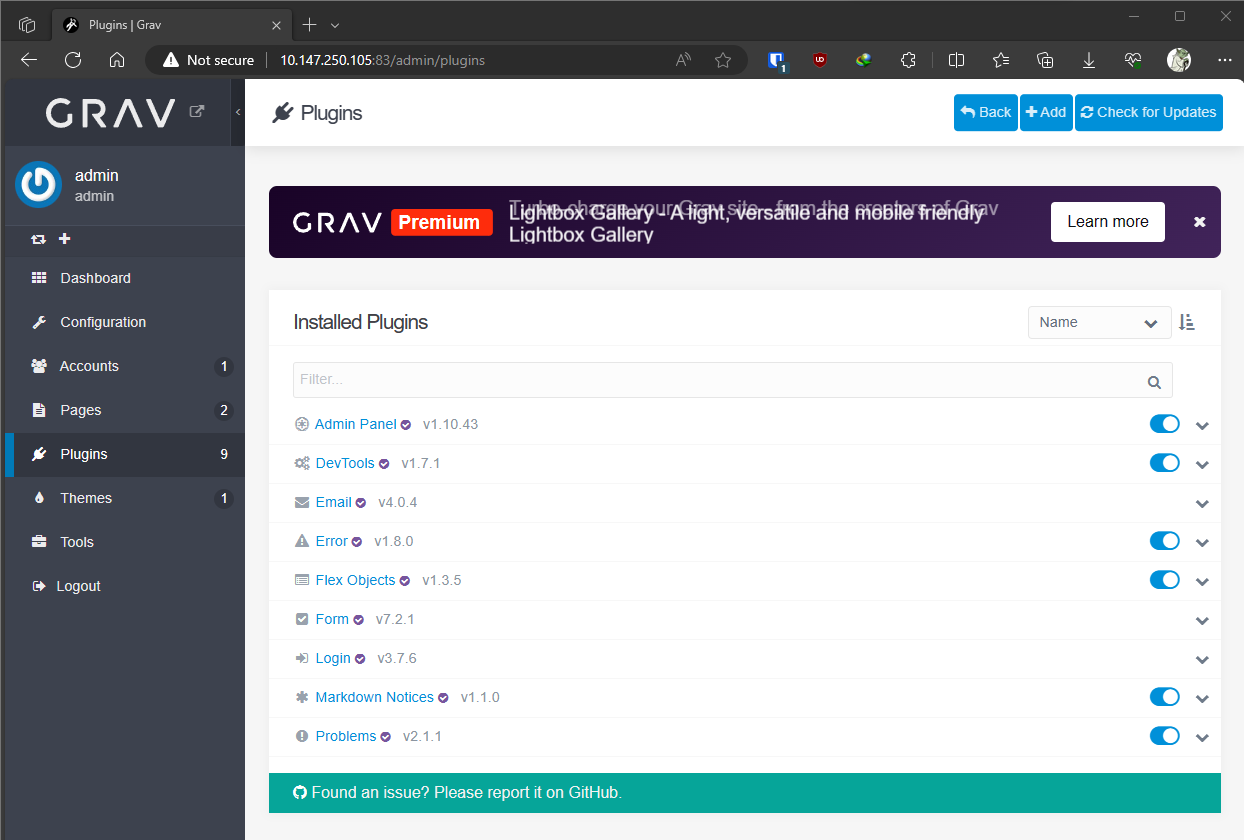
It should now be listed as part of your installed plugins (The other plugins you see already installed are default and needed by the "Quark Theme")
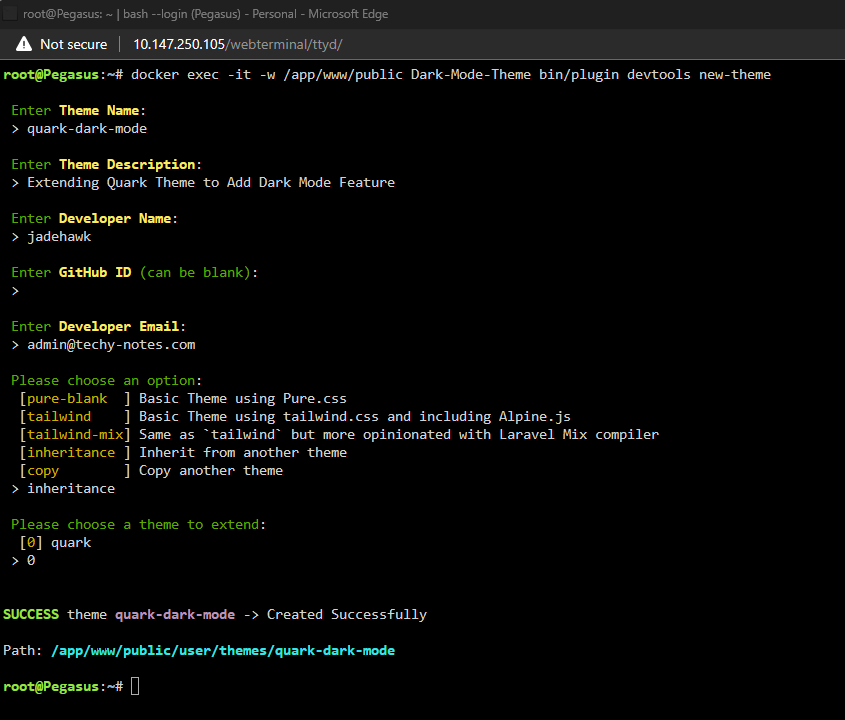
Now to inherit the theme, with Linuxserver.io image we can accomplish this using the following command from your CLI (Command Line Interface / Terminal Window):
docker exec -it -w /app/www/public grav bin/plugin devtools new-themechanging "grav" for the name of your container in my case it will be Dark-Mode-Theme (This is Case-Sensitive):
docker exec -it -w /app/www/public Dark-Mode-Theme bin/plugin devtools new-themeThen follow the prompts.
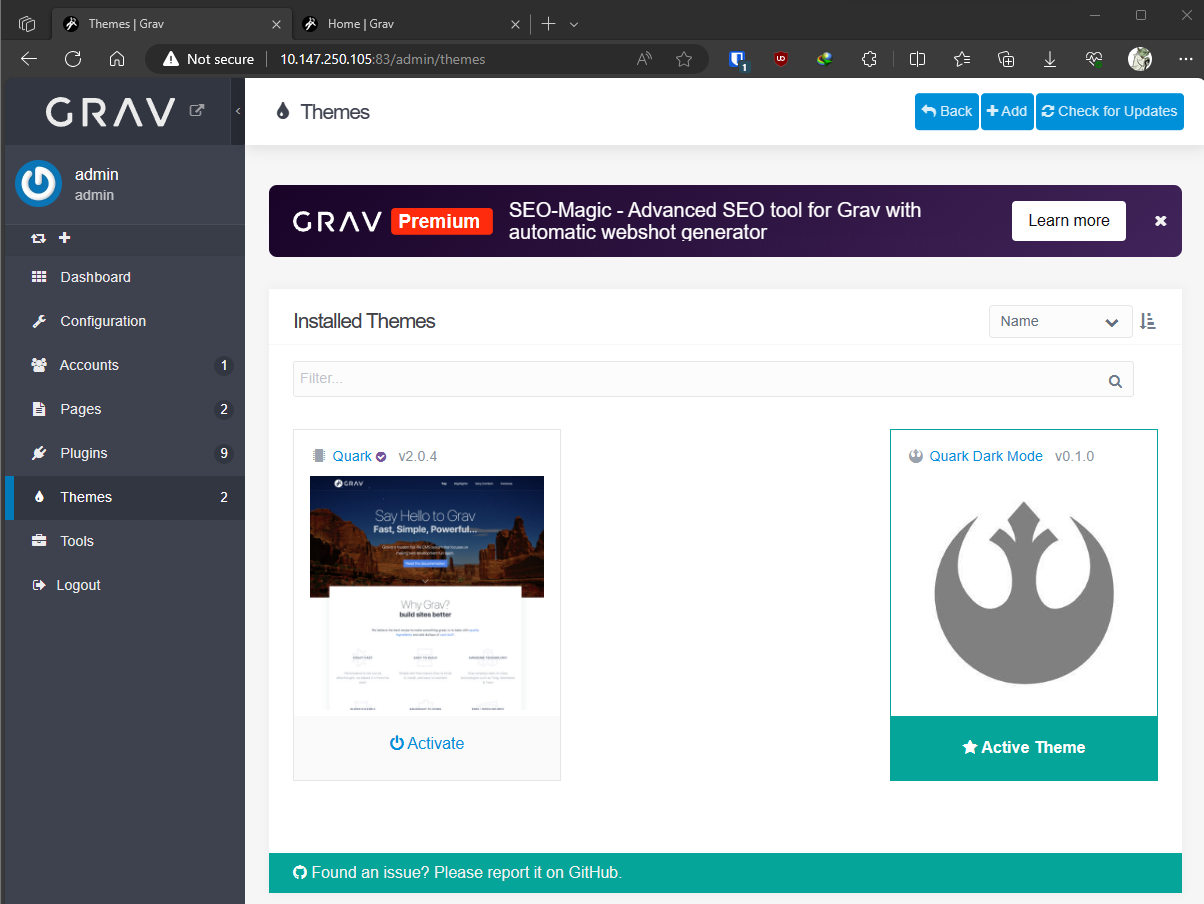
If all went well, you should see your new cloned theme on the "Themes" section of your "Admin" page.
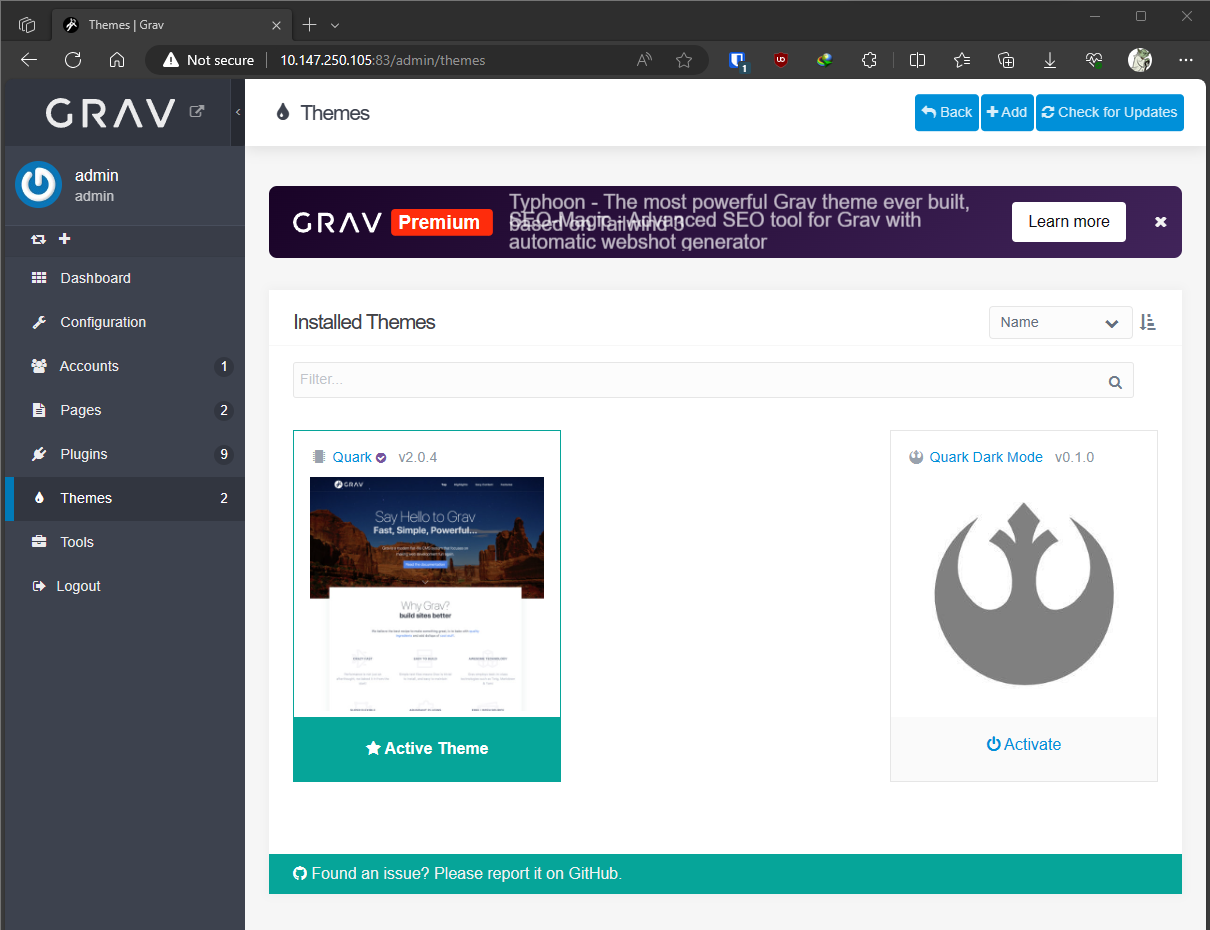
You can go ahead and "Activate" the theme as this will be "OUR" theme where all your changes to the layout will go and will leave the base "Quark Theme" untouched and available for updates. Your theme depends on it, and you can't delete it without breaking your new theme.
Making Changes to our New Theme
First let's download all the files needed from my "GitHub Repository" you can do this by cloning the repo and choosing the zip file.
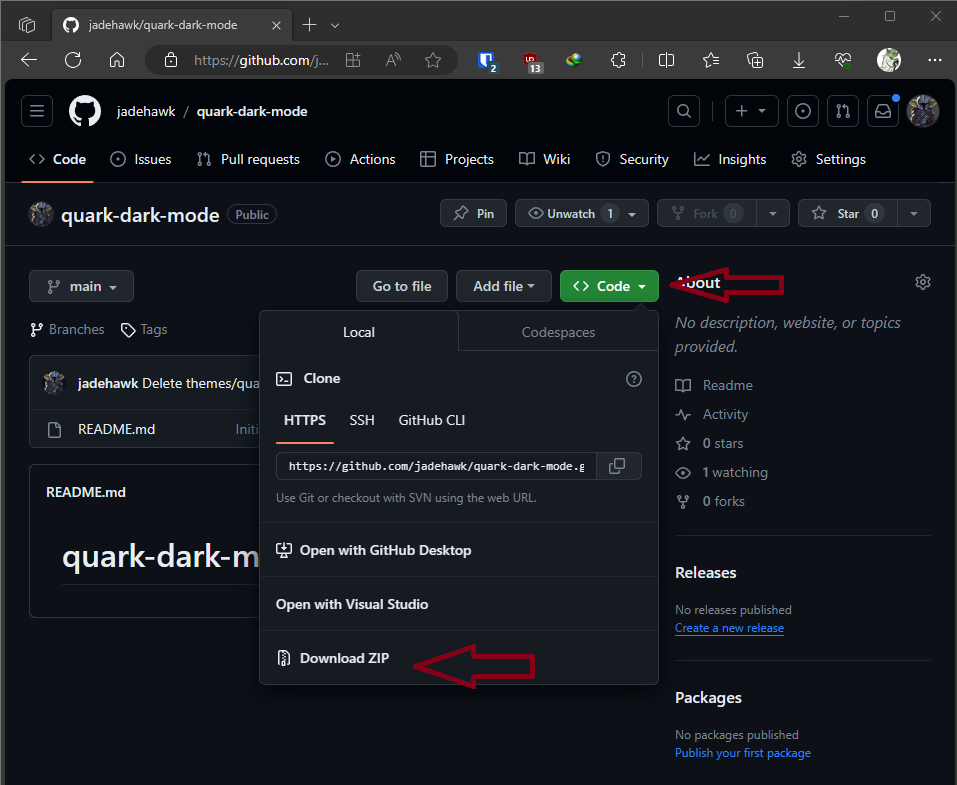
Here comes the fun part and it is very important that you keep in mind the name you gave your theme. If you gave your new-theme the name of "quark-dark-mode" then you can just copy and paste, else you need to change wherever you see "quark-dark-mode" to your theme's name, remember it is case-sensitive which is why I used lowercase.
You need to gain access to the local files now, so go ahead and navigate to where your container data is stored on your hard drive. In my case on Unraid by default all container data go to the "appdata" section and a folder is created with the name of the container in my case "dark-mode-theme". I advise you stop your container at this time.
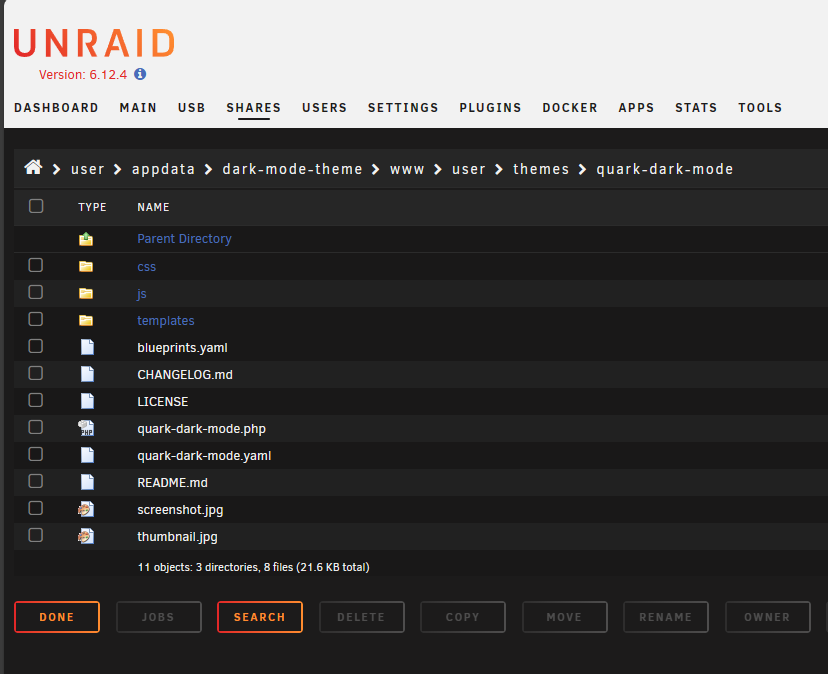
Once you open your container's folder navigate to brand new themes folder in my case is :
/user/appdata/dark-mode-theme/www/user/themes/quark-dark-modehere you will find a bunch of generated files we got when we "inherited" our theme.
There are also 3 empty folders:
- css
- js
- templates
There should also be 2 files named:
- quark-dark-mode.php
- quark-dark-mode.yaml
From the downloaded ZIP file, you need to copy and paste (overwriting) the following folders:
- css
- fontawesome
- images
- js
- templates
You will need to edit "quark-dark-mode.php" with the following content or replace with included file inside the ZIP download:
<?php
namespace Grav\Theme;

use Grav\Common\Theme;

class QuarkDarkMode extends Quark
{
    /**
     * @return array
     */
    public static function getSubscribedEvents()
    {
        return [
            'onTwigSiteVariables' => ['onTwigSiteVariables', 0]
        ];
    }

    /**
     * Add theme assets globally
     *
     * @return void
     */
    public function onTwigSiteVariables()
    {
        // Add FontAwesome Globally
        if ($this->config->get('theme.include_fontawesome')) {
            $this->grav['assets']->add('theme://css/fontAwesome.css');
        }

        if ($this->config->get('theme.dark_mode')) {
            $this->grav['assets']->add('theme://css/darkMode.css');
            $this->grav['assets']->addJs('theme://js/darkMode.js', ['group' => 'bottom']);
        }
    }
}
And you also need to edit "quark-dark-mode.yaml" with the following content or replace with included file inside the ZIP download
streams:
 schemes:
   theme:
     type: ReadOnlyStream
     prefixes:
       '':
         - 'user://themes/quark-dark-mode'
         - 'user://themes/quark'

enabled: true
production-mode: true
grid-size: grid-lg
header-fixed: true
header-animated: false
header-dark: false
header-transparent: false
sticky-footer: true
blog-page: '/blog'
include_fontawesome: true
dark_mode: true
spectre:
  exp: false
  icons: false
At this point restart the container and you should open to your Dark Mode Enabled theme.
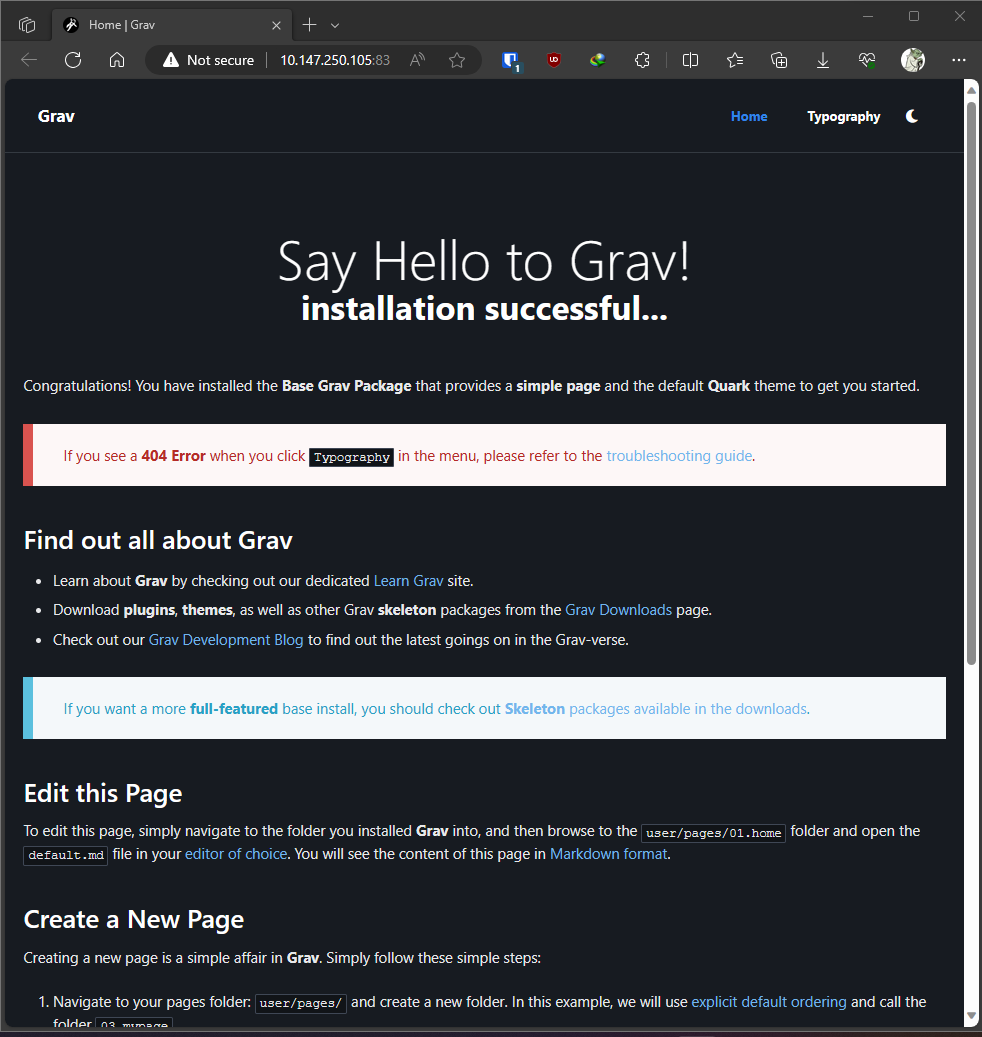
All Changes to CSS can be made under the CSS folder and modifying the "custom.css" file, you will find one named "custom.old" I added a few css lines on this file to change the appearance of the "NOTICES" I think they look better this way.
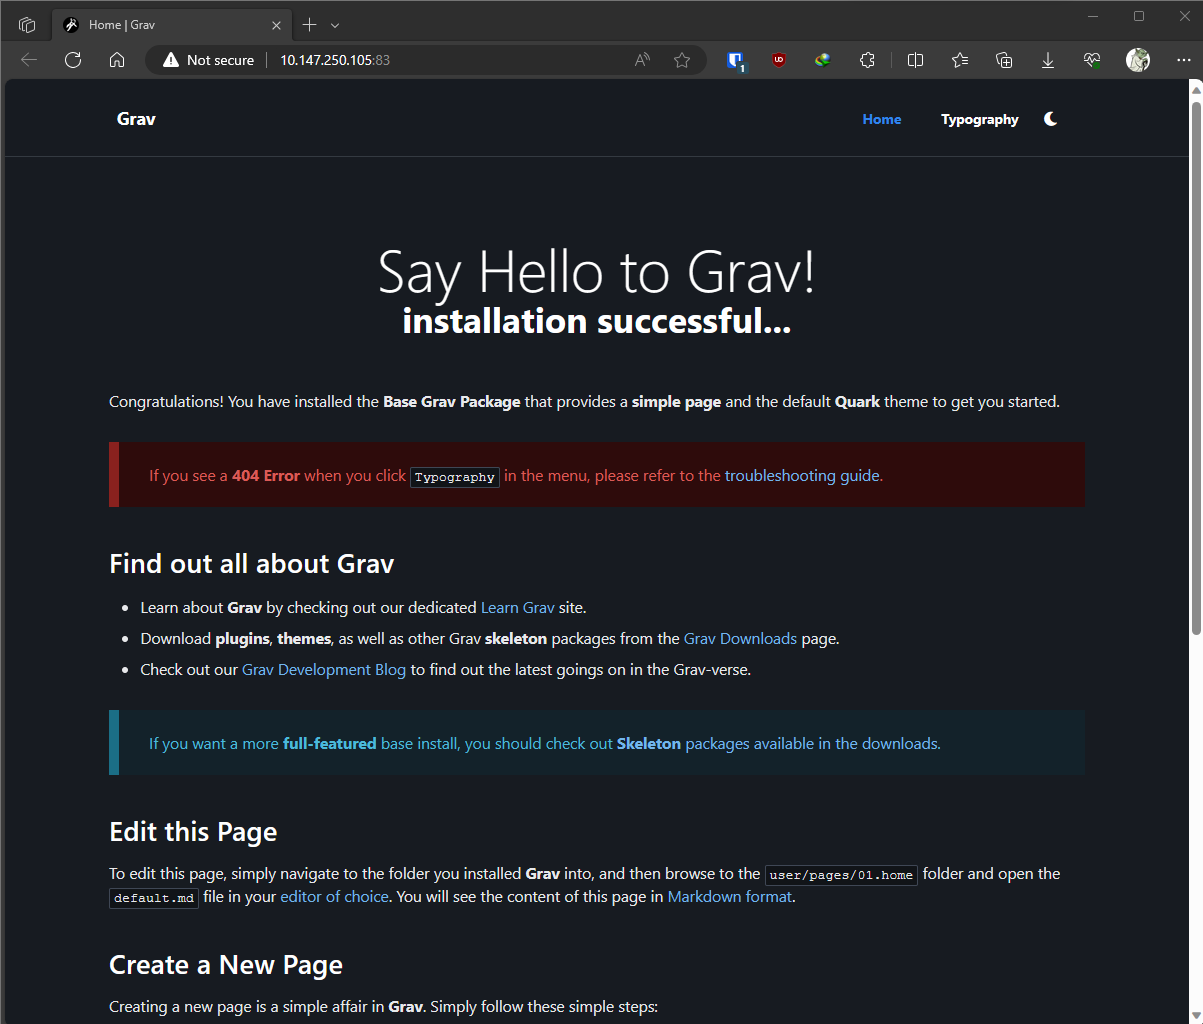
Just change the file name from "custom.old" to "custom.css" and re-load your website as you can see the "NOTICES" are a little easier on the eyes IMHO.
I hope you found this write-up helpful.
Thank you for reading!

.png)